What is the best way to apply flat cut letters?
An amalgamation of sign companies, TRADE-LETTERS.COM is a trade only letter supplier that works closely with clients to ensure that artwork received meets the requirements for flat cut letters and the whole project. Mark Ashcroft, MD of Snapfix shares practical tips for fixing.
SNAPFIX was first invented and patented in 1969 when we created the fixing that is now commonly known and highly regarded in the sign industry as The Locator. Over the years it has become the industry standard letter fixing, Preferred and trusted by companies globally knowing they will not be let down regardless of the weather conditions; from sub-Saharan Africa to the Faroe Islands SNAPFIX always performs.
We offer small, medium and large sizes which are more than adequate for any project they will be used for. SNAPFIX is the only locator supplier to supply its cups in 10 colours to match panel colours, our Rainbow range. Manufactured in the UK to ISO 9001 standard, they are shipped to our distributors and directly to customers across the globe. In early 2016 SNAPFIX moved into a purpose-built factory to further increase storage and manufacturing capability due to worldwide demand for our product, SNAPFIX has been No 1 for almost four decades and the move has enabled us to cement that position and supply our customers for the next 50 years. Here are my top 10 tips:
- Once letters have been cut and removed from excess sheet, they should then be checked and where necessary cleaned off so that the edges are smooth (remove protective cover off the backs).
- Using the same file that has been used for the cutting process, print off the template for the finished design in order to mark locator positions.
- Place the text onto the template reverse side up to make sure that there are no items missing.
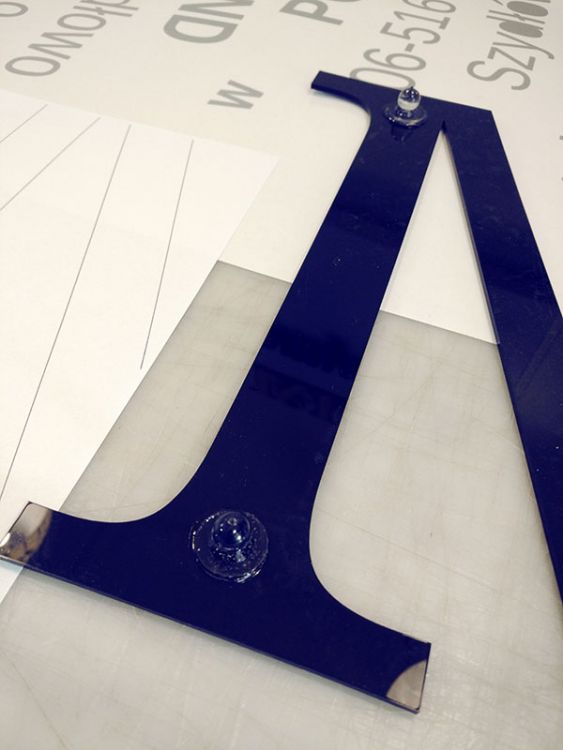
- Using the correct adhesive for acrylic/ foam or two-part methacrylate for ACM (Dibond/Reynobond material), apply the selected size of locator to each letter (usually between 2-4 per letter depending on size). Leave the adhesive to dry (usually around 30mins, although this can vary depending on climate conditions).
- Once the adhesive is dry and the locator cannot be moved, turn each letter over and press down on to the paper so that the locators leave an indentation; Snapfix is manufactured with a small sharp point for this purpose. After all letters have been through this process, using a stamp or pen mark where each indentation appears.
- Number each letter on the template with its counterpart to ensure fitting is easier if there are two letters the same and as a second check that all letters required are there).
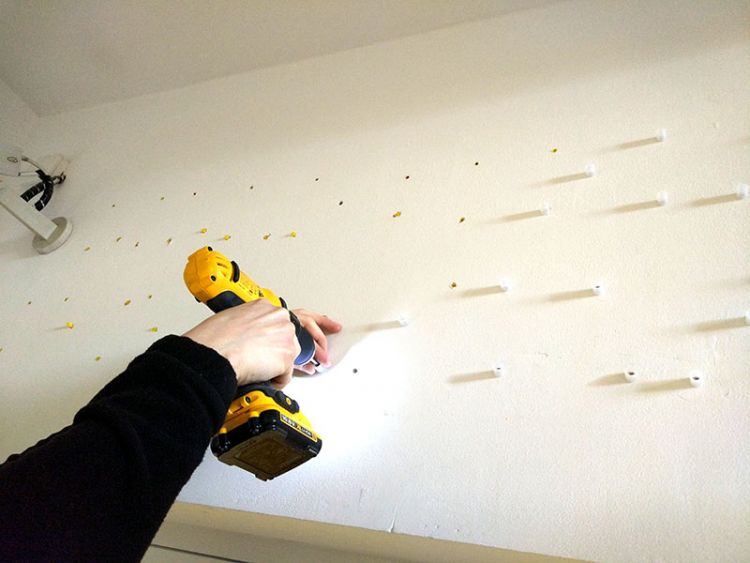
- Fit template to wall in the desired position that the letters need to be installed and use masking tape to hold template in position.
- Drill fixing holes suitable to whatever surface you are fixing to and screw the locators through the template precisely onto the pen marks made in step 5.
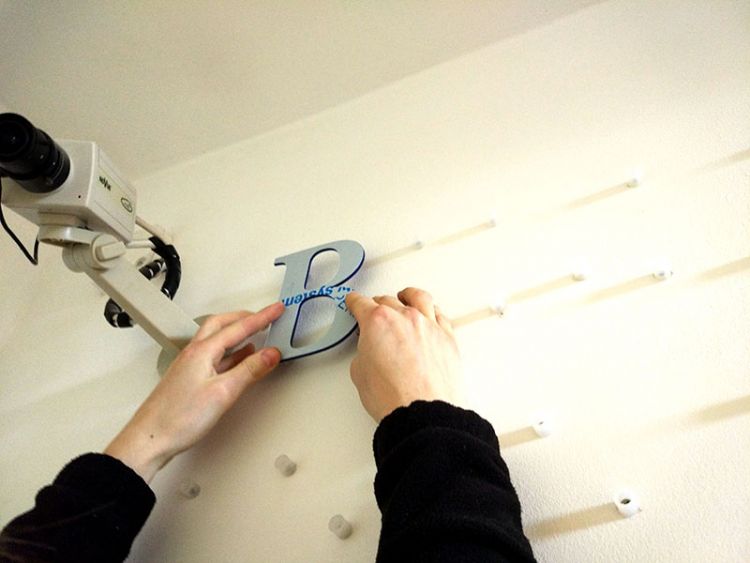
- Remove the template and push the letters into the locators fitted to the wall.
- Once all the letters have been installed remove the protective film on the face of each letter.