How to make cut acrylic shine like a diamond


Polishing acrylic has been done in a number of ways over the years depending on equipment, skill and the technology available. Today, in most cases, a polished finish straight off the CNC router is something which people want but very few seem to be able to consistently master it on a larger scale. Liam Hodson, machining & tooling consultant at LKH shares some practical tips.
This problem is partly due to variables faced by the machine and operator alike. Hand finishing in most cases can give mixed and inconsistent results. A laser is often the first port of call but in some cases that’s not possible. What if there are bevelled edges or rebates to consider? The heat also distorts the edge making it prone to cracking in certain conditions. It’s not an exact vertical cut so it’s not an option for assembled products, in a display environment for example.
Flame polishing can be time-consuming and labour intensive. It’s not consistent and suffers from the same issues as the laser but in addition, holes are near impossible to polish. This technically can be very challenging and would require a good level of experience to attempt pockets and bevels. Hold the flame in one place for too long and it will distort the surface, giving uneven results. So what other options are available to achieve polished edges?
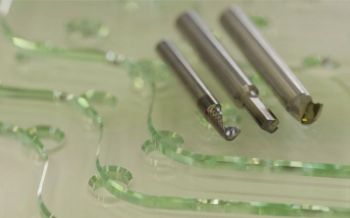
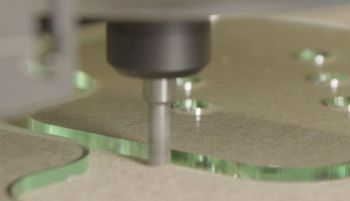
With the right settings a CNC router and balanced tooling from Crown Norge, specifically designed for acrylic (available from LKH Tools) can get very close to a polished finish. Although this may not be what is seen on the material face, it can be more than acceptable for some or most applications. The desired consistency can also be obtained due to the rigorous quality control at the manufacturing stage of the tool. This ensures the tools are same geometry, sharpness, balancing and high grade of carbide as the previous tool. A stable platform is required to obtain the best results. A smooth motion, rigid machine construction will provide this, along with a well maintained and high quality routing spindle. An unbalanced routing head, collet or tool holder will not produce the desired result. The additional balancing flutes of the Crown Norge tools reduces the unwanted vibration even further. This ensures less ripples or oscillation marks in the material edge.
A strong vacuum hold down is essential when trying to obtain the best finish. Wherever possible this needs to be ukconcentrated into the area used to maximise the vacuum pump flow or pressure (depending on which type used). Extraction needs to be of a good standard and any debris removed before any clean up or polishing pass can be applied.
If a collet and lock nut system is used, then consistency on how the tool is tightened is a further factor. Too much pressure on a lock nut will put a slight imbalance in the tools rotation. A torque wrench is a good way to solve the issue and will mean each tool is tightened to the same level; a good tip: if more than one machine operator is setting the machine.
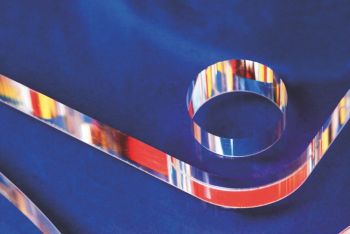
Doing this will provide a certain level of gloss to the edge but to truly achieve the best results then a MCD or PCD diamond tool must be used. This is not to cut the material in its entirety but to take a small amount (0.05-0.1mm) of material after the initial cut performed with the acrylic routing tool. This polishing pass transforms the edge, giving the translucent finish, which is very much desired. Not only can these tools provide a polished pocket but a chamfered edge is available with the V-shaped version.
This would allow polishing of countersunk holes for example. Crown Norge PCD and MCD tools are from the highest quality diamonds and are balanced to provide the best finish and quality available. Although high speed spindles (60,000 rpm) will provide faster feed rates on polishing, similar results can be achieved from standard 18,000-24,000 rpm spindles.
