Delcam Artcam Tutorials

Tutorials on Artcam Express 2015 from 
-
 Advanced 3D modelling & digital sculpting with ArtCAM 2015This video demonstrates the powerful 3D modelling capabilities within the advanced products in the range, ArtCAM Pro and ArtCAM JewelSmith.
 -
 Creating a 3D sign using ArtCAMIn this tutorial video explains the process of how a 3D sign is created in ArtCAM Express or ArtCAM Insignia using different toolpaths and machining techniques.
 -
 Creating a Saw Mill sign using ArtCAM InsigniaThis tutorial demonstrates how to create a 2.5D Saw Mill sign from vector artwork in ArtCAM Insignia.
 -
 Creating Christmas Signage With ArtCAM Express In this ArtCAM Express demonstration we'll be walking you through some of the great design and manufacturing features
 -
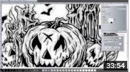 Create Your Own Halloween Signs With ArtCAM Express 2013In this Halloween themed demonstration we'll be giving you an introduction to the great new design and manufacturing features of ArtCAM Express 2013.
 -
 Creating Simple Signage With ArtCAM ExpressIn this demonstration we'll be looking at creating simple 2D signage in ArtCAM Express, we'll also be using the Font Creator and Advanced 2D Machining Modules.
 -
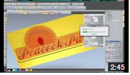 ArtCAM 2012 - Creating Peacock Park 3D & Vbit SignageFor the release of ArtCAM 2012, we've created some 3D and Vbit signage that utilises some of the great new tools for sign makers available in our latest release.
 -
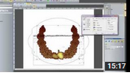
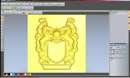
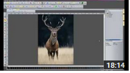 ArtCAM Pro 2011 For Signmaking | On The Rocks Part 1 - Modelling The StagThis six-part demonstration shows how easy it is to create a 3D sign using ArtCAM Pro 2011 - the premier artistic CADCAM package from Delcam.
 -
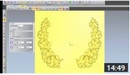 ArtCAM Pro 2011 For Signmaking | On The Rocks Part 2 - Making LeavesPart two of our six-part demonstration shows how easy it is to create a 3D sign using ArtCAM Pro 2011 - the premier artistic CADCAM package from Delcam.
 -
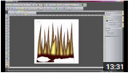 ArtCAM Pro 2011 For Signmaking | On The Rocks Part 3 - The GrassPart three of our six-part demonstration shows how easy it is to create a 3D sign using ArtCAM Pro 2011 - the premier artistic CADCAM package from Delcam.
 -
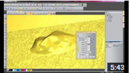 ArtCAM Pro 2011 For Signmaking | On The Rocks Part 4 - The RocksPart four of our six-part demonstration shows how easy it is to create a 3D sign using ArtCAM Pro 2011 - the premier artistic CADCAM package from Delcam.
 -
 ArtCAM Pro 2011 For Signmaking | On The Rocks Part 5 - Bringing It All Together Part five of our six-part demonstration shows how easy it is to create a 3D sign using ArtCAM Pro 2011 - the premier artistic CADCAM package from Delcam.
 -
 ArtCAM Pro 2011 For Signmaking | On The Rocks Part 6 - Machining Your Sign The final part of our six-part demonstration shows how easy it is to create a 3D sign using ArtCAM Pro 2011 - the premier artistic CADCAM package from delcam.
 -
 ArtCAM CNC machine tool compatibilityWe are often asked what CNC machines our artistic range of design & manufacturing (CADCAM) software will work with. In this video Delcam's ArtCAM Project Manager, Tim Buck. explains.
 -
 Help creating vectors with ArtCAM 2015 R2Snap hints are a new addition to Delcam's artistic range of computer-aided design and manufacturing (CADCAM) software, ArtCAM 2015 R2.
 -
 Working with 2D & 3D artwork in ArtCAMIn this video, ArtCAM Project Manager, Tim Buck, talks about working with 2D & 3D artwork in ArtCAM
 -
 Create a Space Shuttle sign in ArtCAM ExpressLearn how to create signs using custom clipart and fonts in ArtCAM Express 2015 R2.
Tutorials on Artcam Express 2011 from
-
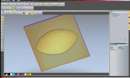
 Create a sundialThis tutorial will show how to create a sundial using many of the features within ArtCAM Express and the available modules
 -
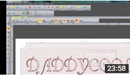
 Creating & Editing FontsThis demonstration will show how to edit or create fonts using the "Font Creator" module for ArtCAM Express.
 -
 Machining a 3D ReliefThis tutorial shows how to import a 3D Relief from the "Relief Clipart Library" and then machining the part ready to send to a CNC machine
 -
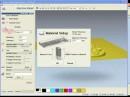
 2D Engraved SignThis demonstration shows how to create a 2D Engraved Sign using the Smart Engraving module and will also show how to change the rendered material.
 -
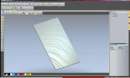
 Creating a light boxThis tutorial will show how to create a die bond light box using ArtCAM Express and maching it by selecting layers using the "Vector Tools" module.
 -
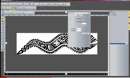
 Creating a logo using multiple imagesThis demonstration shows how to create a logo using multiple images with the help of the module "Bitmap Layers" and creating vector artwork from the images.
 -
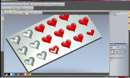
 Nesting multiple partsThis demonstration will show how to nest multiple parts to minimise wastage of material using the ArtCAM Express module, "Nesting".
 -
 Texture ToolpathThis video demonstrates how to create a textured door panel using ArtCAM Express with the module, "Texure Toolpath".
 -
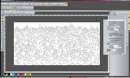
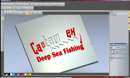
 Creating Vector Artwork from an ImageIn this tutorial we demonstrate how to create vector artwork from an image imported into ArtCAM Express.
 -
 Feature Machining 1This tutorial shows how to leave "features" on 3D reliefs using the module "Feature Machining" and how to machine the whole part to send to a CNC".
 -
 Feature Machining 2This tutorial shows how to leave "features" on 3D reliefs using the module "Feature Machining" and how to machine the whole part to send to a CNC.
 -
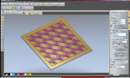
 Raised Round MachiningThis demonstration shows how to create a Chocolate Mould using the "Raised Round" module for ArtCAM Express to create form using 2D vectors.
 -
 Embossing DieThis demonstration shows how to create an embossing die using the "Smart Engraving" module for ArtCAM Express.
 -
 Creating an InlayThis tutorial shows how to create an Inlay for a sign within ArtCAM Express 2011.
Tutorials on Artcam Express 2009 from
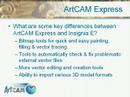 Overview of ArtCAM Express A Power Point Presentation.
-
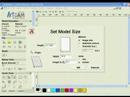
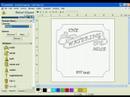 Sign Demonstration from scratch with 3D This video shows ArtCAM Express being used to take a sign from concept to finished part.
 -
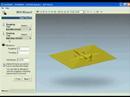 Demo#1 Loading in and working with 3D File. This video demonstrates Artcam Express' ability to load in pre-created 3D files in order to be pasted in and then in turn toolpathed.
 -
 Demo #2 Creating a 3D Texture from an Image. This video shows off ArtCAM Express' ability to quickly and easily load in an image/raster file and then have the software convert the image into 3D.
 -
 Machining a 3D Relief Using ArtCAM Express 2009.